Portland Guitar Co. | Portland Oregon | Contact Jay Dickinson-503.245.3276 | jay@portlandguitar.com
Portland Guitar Pretty Good Intonation (PGPG) System
Finished Build
Classical Model
Serial # CLM 1.2.59
- Body: Indian Rosewood
- Top: European Spruce
- Neck: Mahogany w/ Ebony fretboard & gold fretwire
- Binding: Black PVC w/ rope purfling and red pinstripe
- Gold Gotoh® Premium Classical Tuners w/Ebony buttons
Page 2
 ( 070 ) 30-Nov-2013
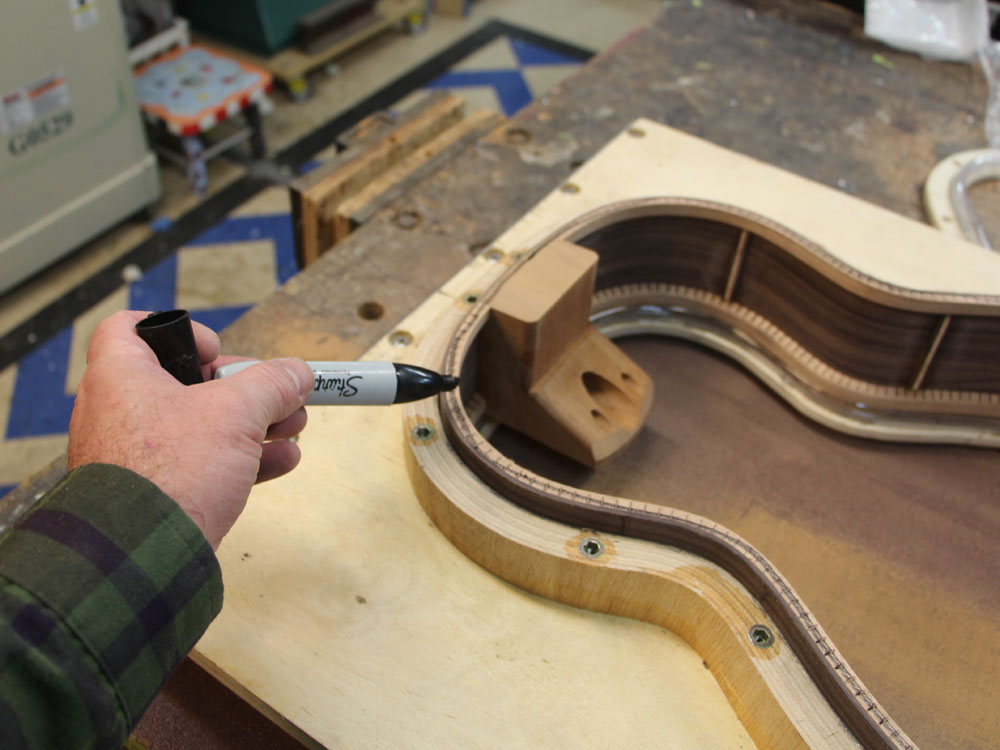
The back of this guitar has the shape of a bowl with a 15 foot radius. The top is flat. The rim of the guitar, with its feminine profile, has to match the shape of the bowl. To do this I use a large sanding plate with the proper bowl shape hollowed out of the plate. I will run the guitar rim over the sanding plate until I get a good match between the two. I mark the edge of the rim with a magic marker and when I have sanded away all of the marker I know the match is good.
 ( 071 ) 30-Nov-2013
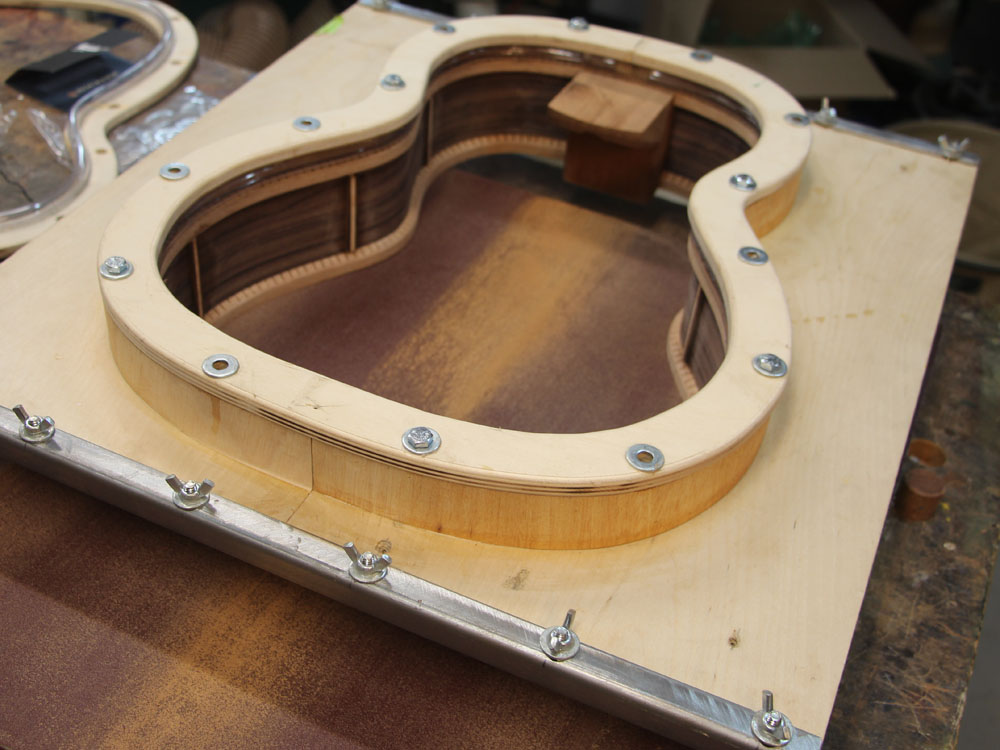
The top flange forces the rim to stand proud of the form so it is easy to slide on the sanding plate.
 ( 072 ) 30-Nov-2013
After a bit of elbow grease is applied, the edge of the rim has the right shape and the proper angle.
 ( 073 ) 30-Nov-2013
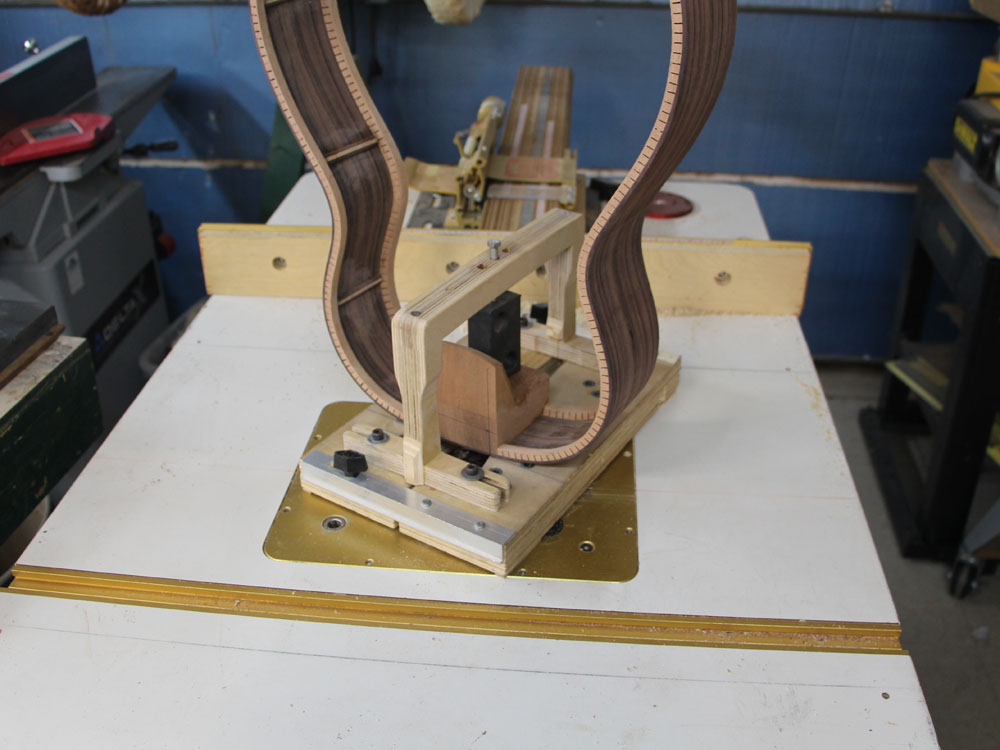
After shaping the top and back edges of the rim I set up to route out the heel block channel. I use the router table and this special fixture to hold the rim and follow the template.
 ( 074 ) 30-Nov-2013
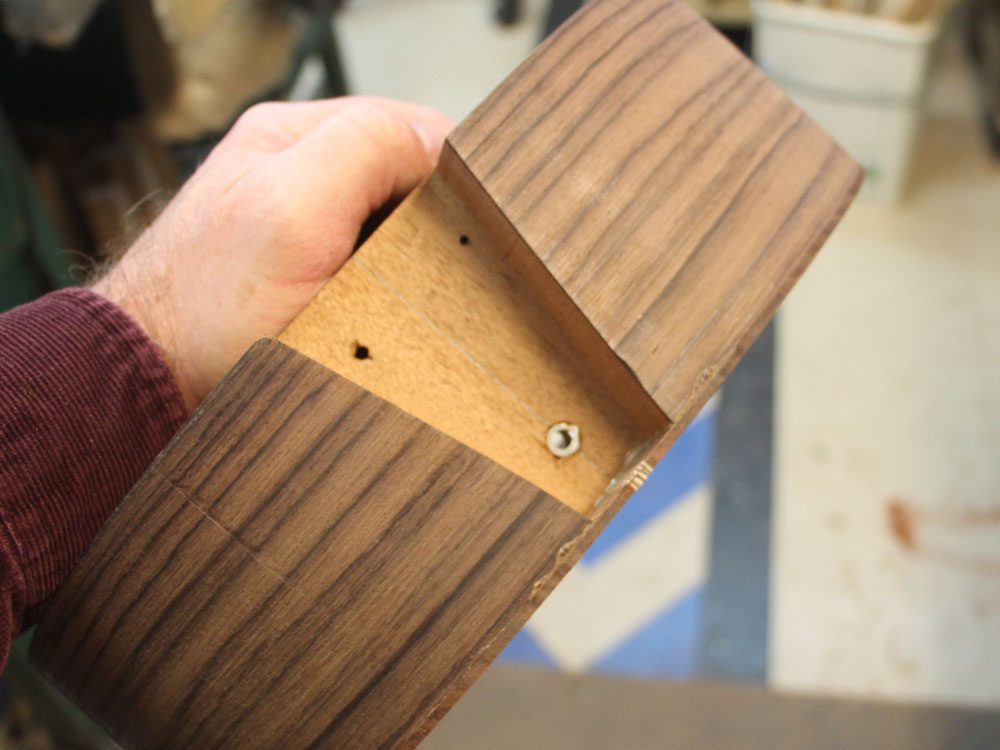
When I am finished The channel is one inch deep and has the same shape as the heel of the neck. The heel channel will hold all of the hardware for the User Adjustable Tilt action Neck.
 ( 075 ) 30-Nov-2013
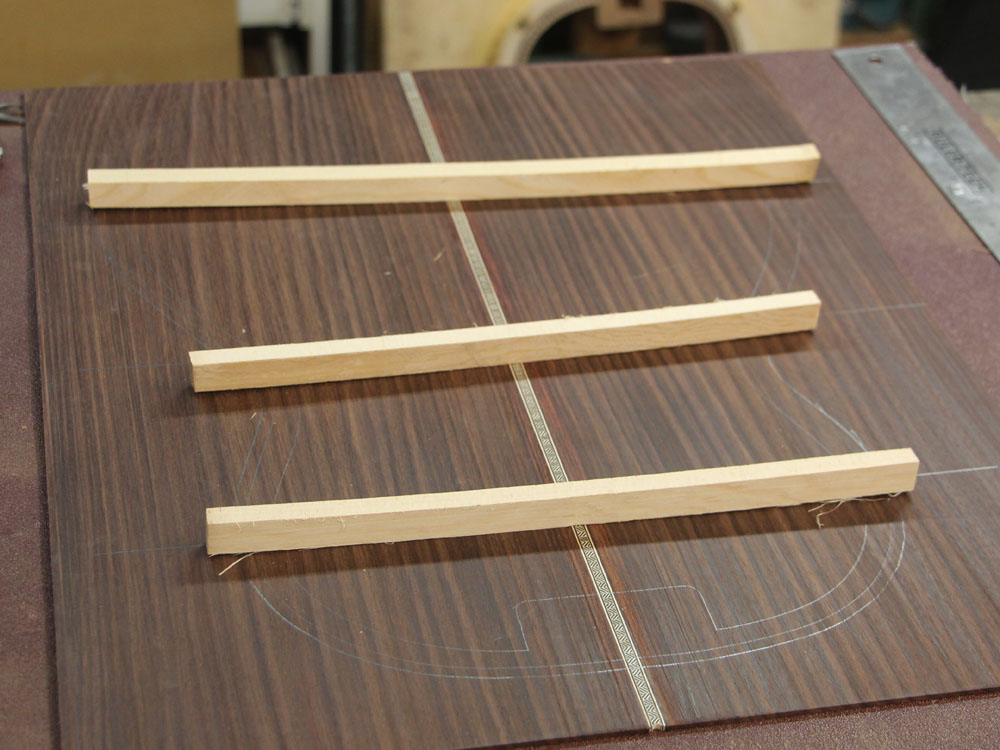
Now, to make the braces for the back. This template has the same shape as the 15 foot radius sanding bowl. The template guides the shaping of the brace blanks on the belt sander.
 ( 076 ) 30-Nov-2013
After the bottom of the brace is formed, I cut the top edge on the band saw.
 ( 077 ) 30-Nov-2013
Three braces.
 ( 078 ) 30-Nov-2013
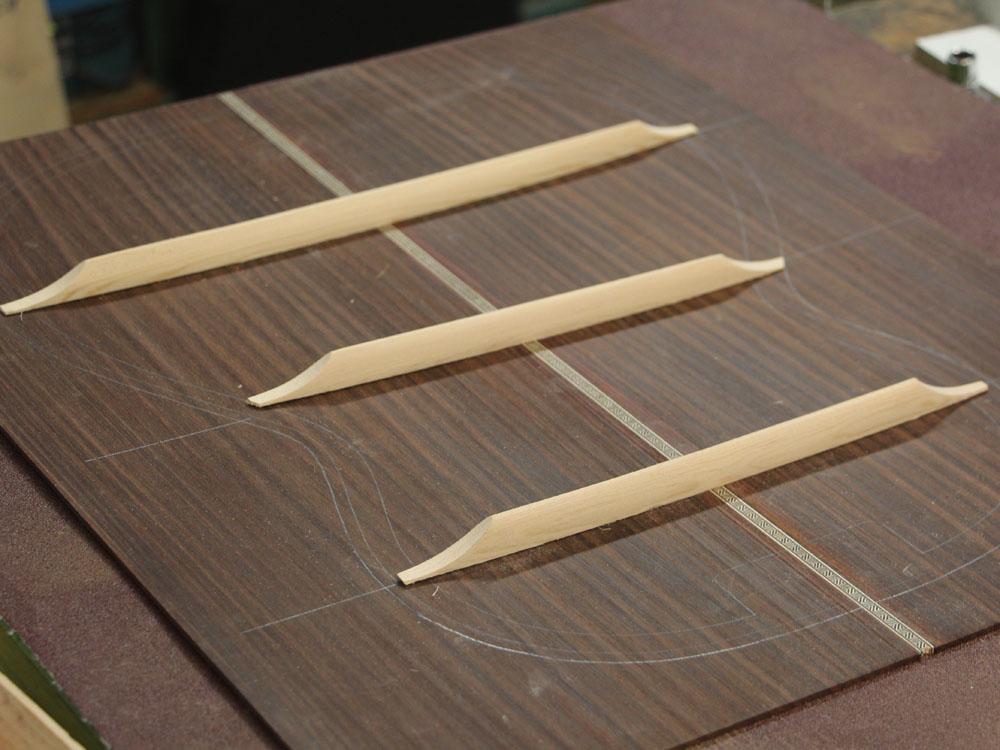
I use a variety of tools to shape the braces.
 ( 079 ) 30-Nov-2013
 ( 080 ) 30-Nov-2013
 ( 081 ) 30-Nov-2013
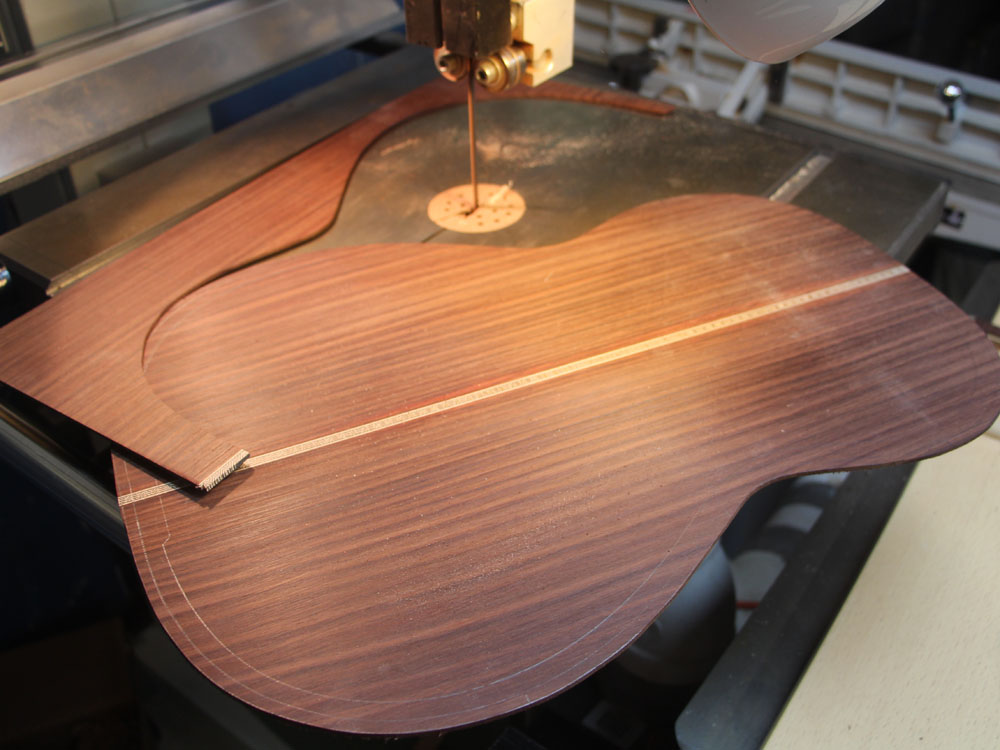
After drawing the outline of the back on the back blank, I use the band saw to cut it out.
 ( 082 ) 30-Nov-2013
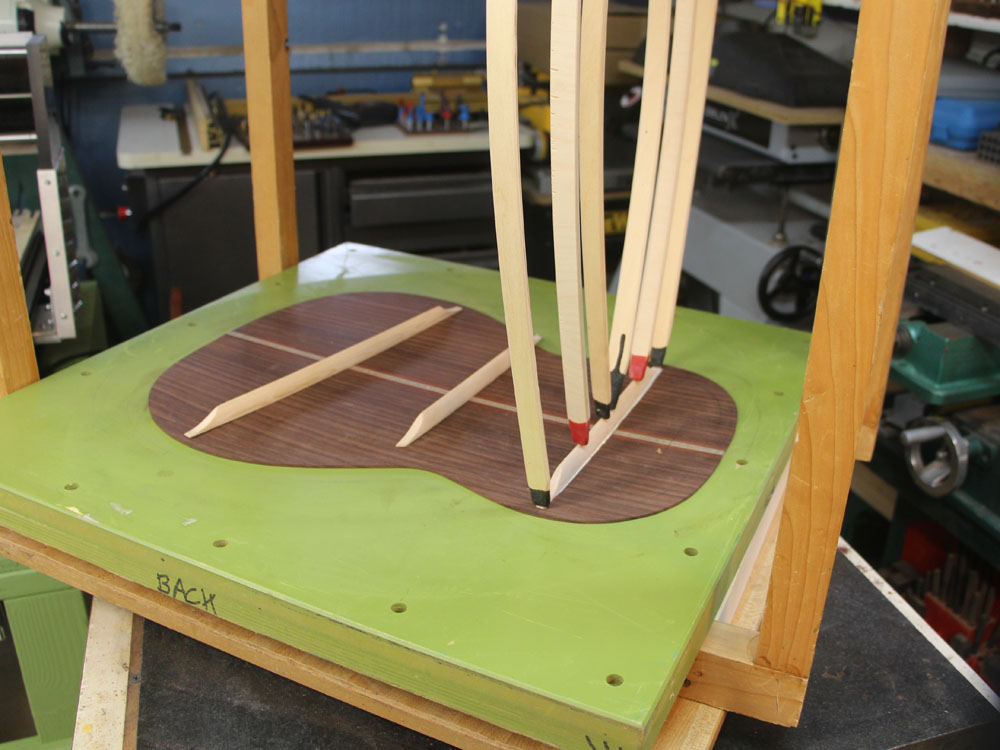
And then I use the go-box to press the braces into place as the glue dries.
 ( 083 ) 30-Nov-2013
I don't know why it is called a Go-Box, any ideas?
 ( 084 ) 30-Nov-2013
Here I am cutting out the slot where the braces will get tucked into the kerfing.
 ( 085 ) 30-Nov-2013
 ( 085.2 ) 30-Nov-2013
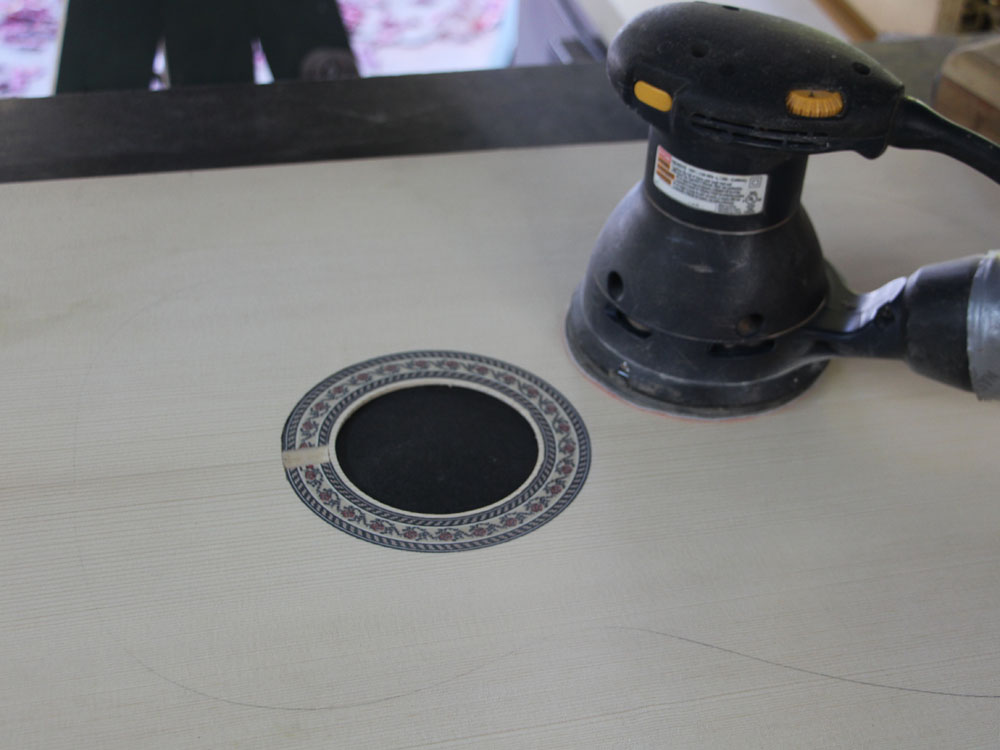
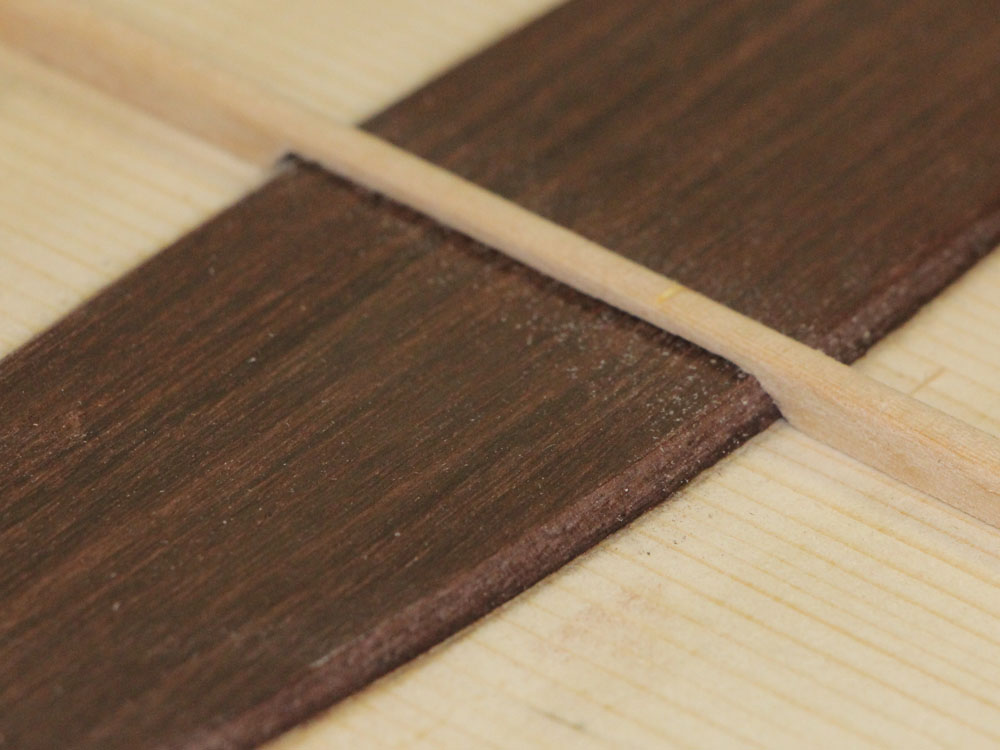
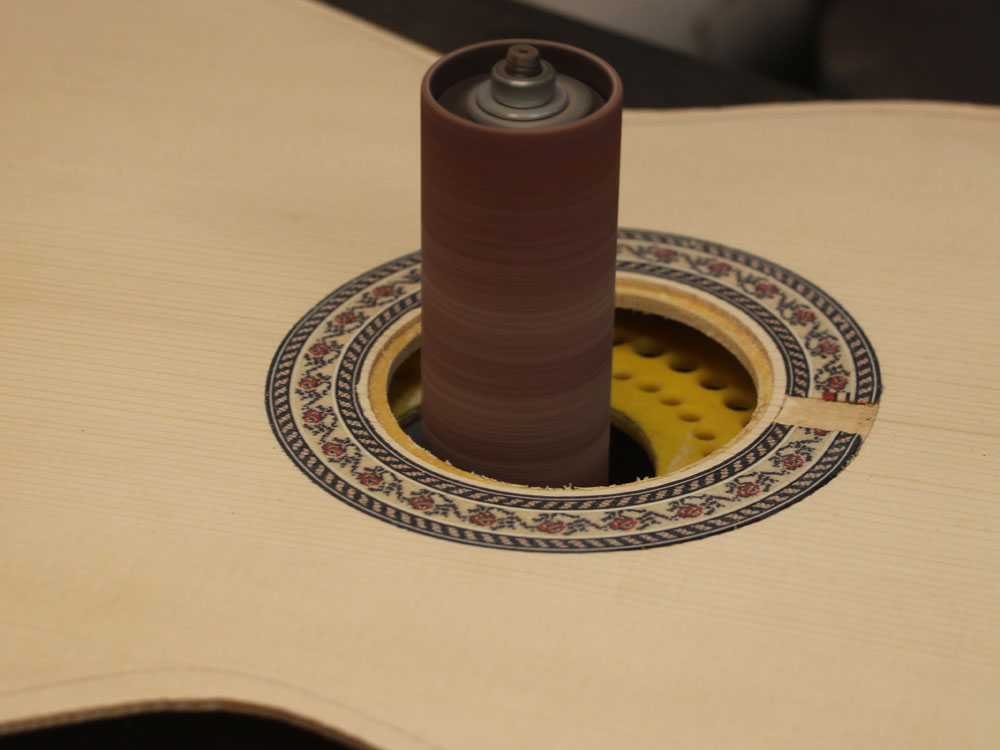
Here I am routing out the channel for the rosette in the top plate.
 ( 085.3 ) 30-Nov-2013
The rosette is glued into the channel so it stands a bit proud, and then is sanded flush with the top.
 ( 086 ) 30-Nov-2013
Now I lay out the design on the top plates.
 ( 087 ) 30-Nov-2013
Cutting out the Indian Rose bridge plate. The bridge plate is glued to the underside of the top plate below the bridge.
 ( 088 ) 30-Nov-2013
I use my small disk sander to put a bevel on the bridge plate. No one will ever see it, but I think it is important to make the inside of the guitar as nice as the out side. The Gods know.
 ( 089 ) 30-Nov-2013
After cutting all of the brace blanks out I lay them out and then think about them for a while.
 ( 090 ) 30-Nov-2013
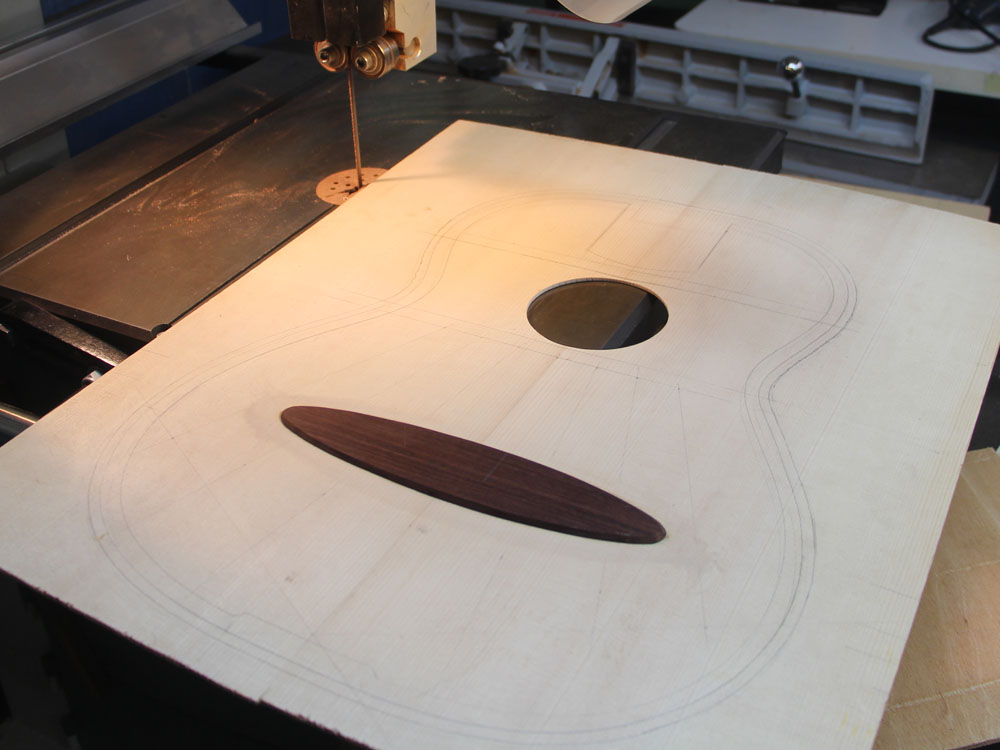
After gluing on the bridge plate I cut the top out with my band saw... did I mention that I love my band saw.
 ( 091 ) 30-Nov-2013
I will use the scraps for other parts of the top.
 ( 092 ) 30-Nov-2013
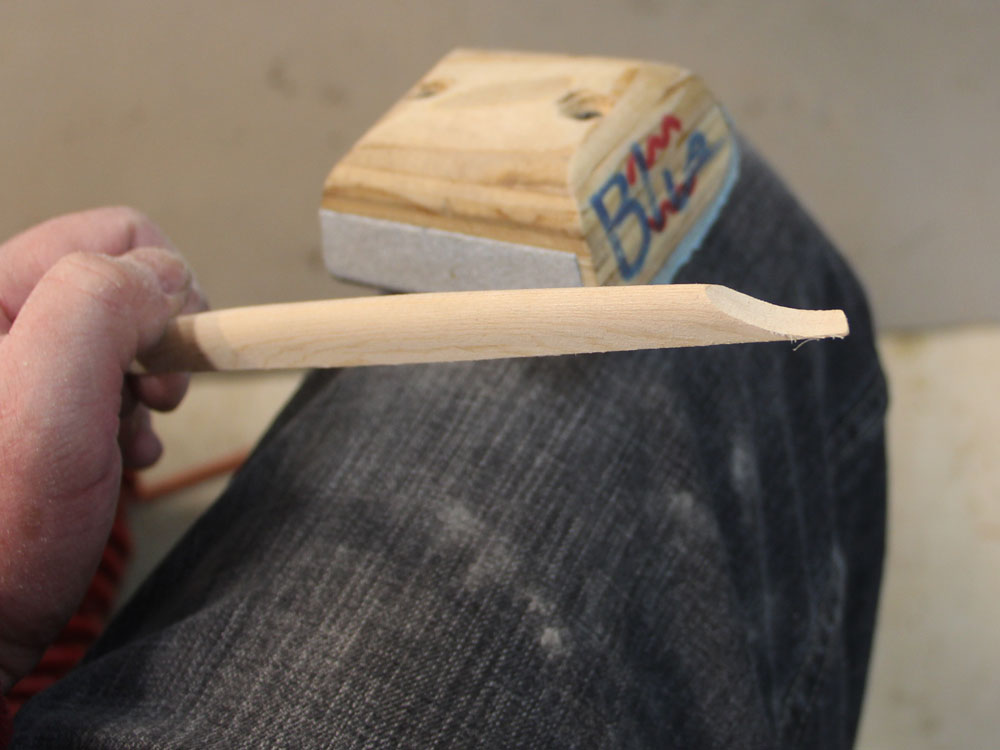
The major cross brace getting shaped with a bit of hand sanding.
 ( 093 ) 30-Nov-2013
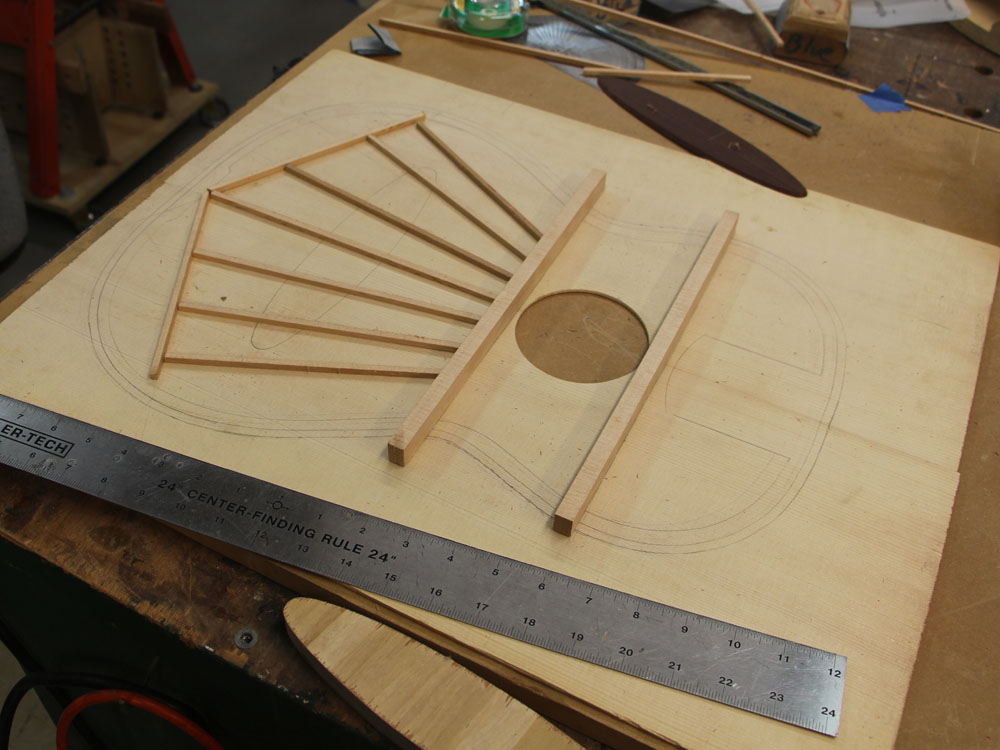
Laying out the parts one more time.
 ( 094 ) 30-Nov-2013
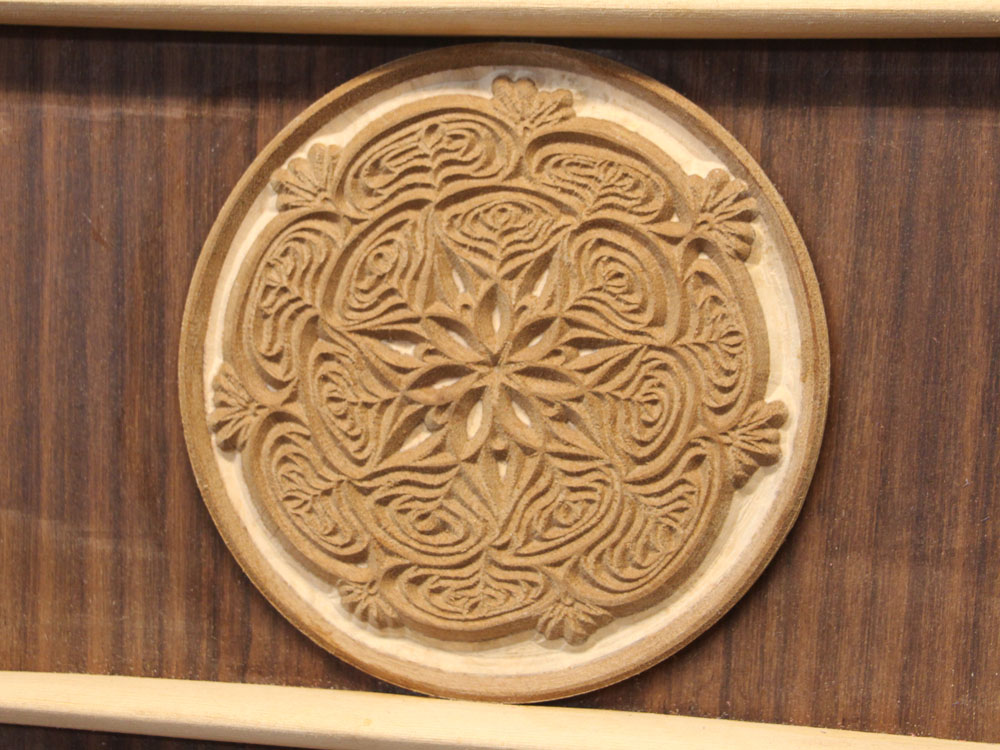
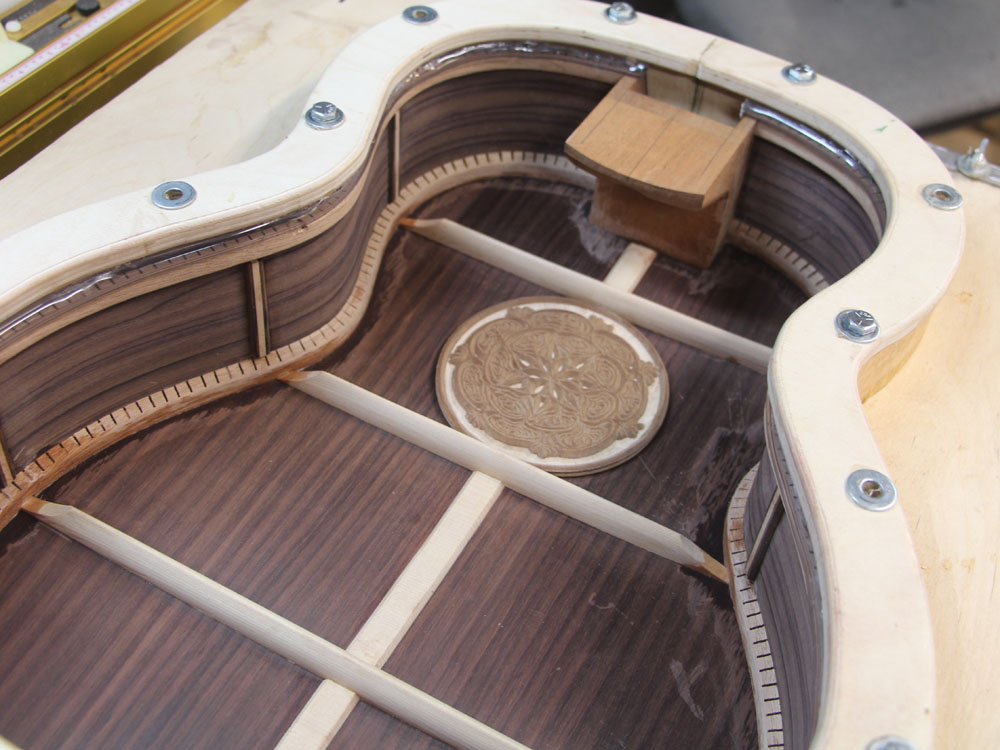
A quick tangent. I recently added a CNC router to my tool set and used it to create this contra-rosette. It will be placed on the inside of the guitar right below the sound hole.
 ( 095 ) 30-Nov-2013
Here one the top braces transverses the bridge plate.
 ( 096 ) 30-Nov-2013
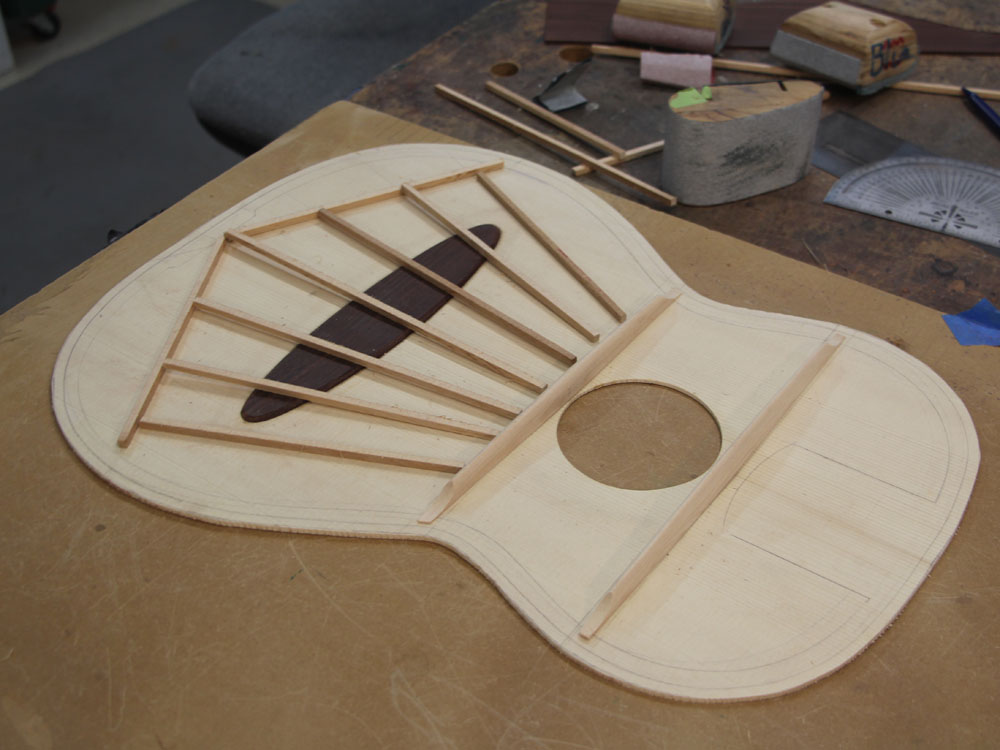
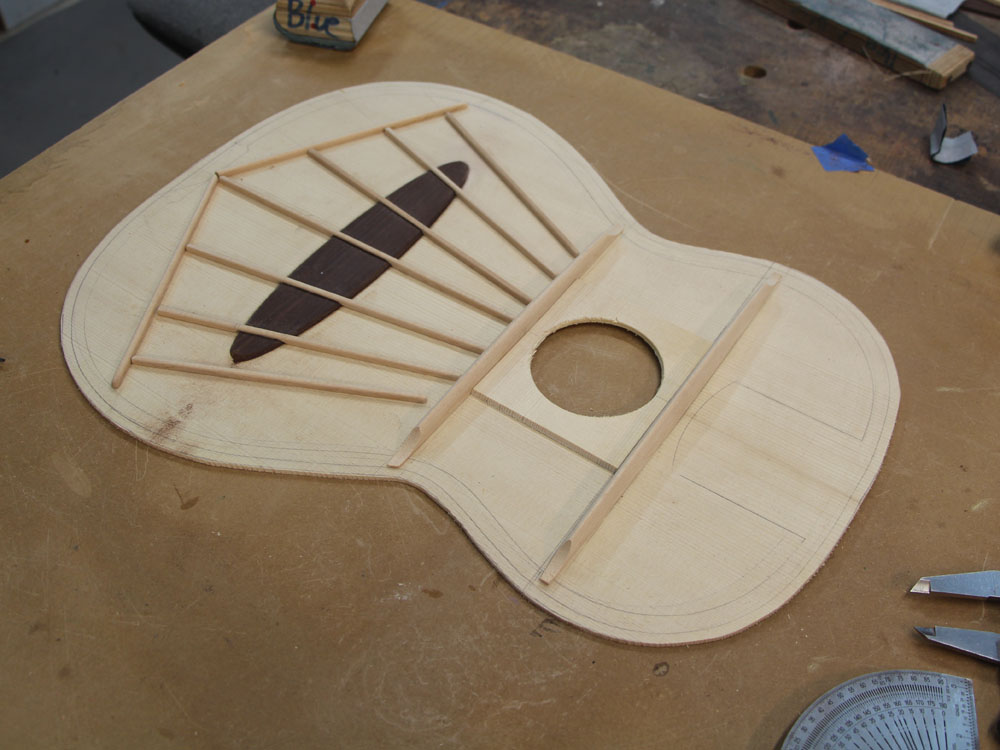
Laying out the braces one more time after all of the braces have been shaped.
 ( 097 ) 30-Nov-2013
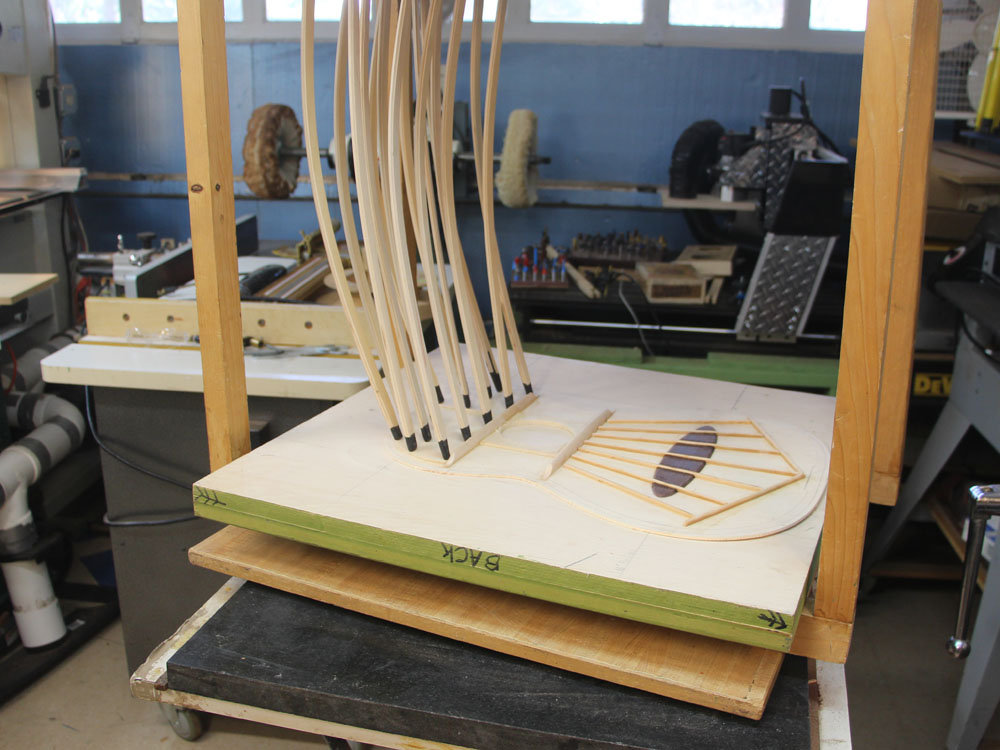
The braces get glued into place with the aid of the go-box.
 ( 098 ) 30-Nov-2013
After the glue has set up over night I pull it out of the go-box and listen to it ring.
 ( 099 ) 30-Nov-2013
I use my oscillating sander to trim up the sound hole ring.
 ( 100 ) 30-Nov-2013
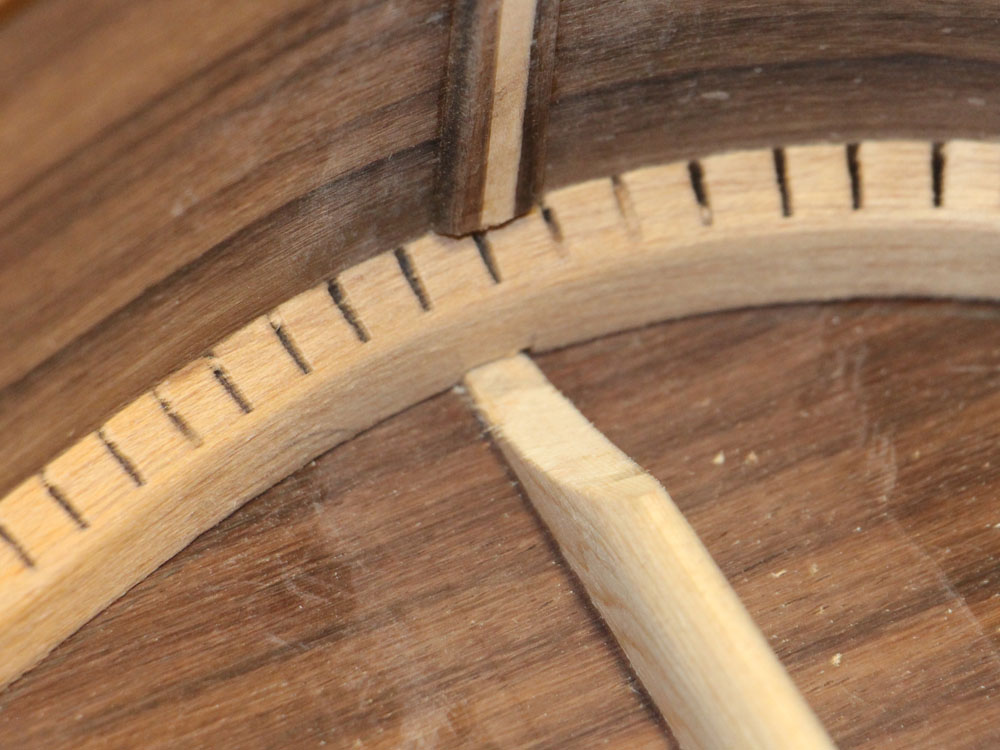
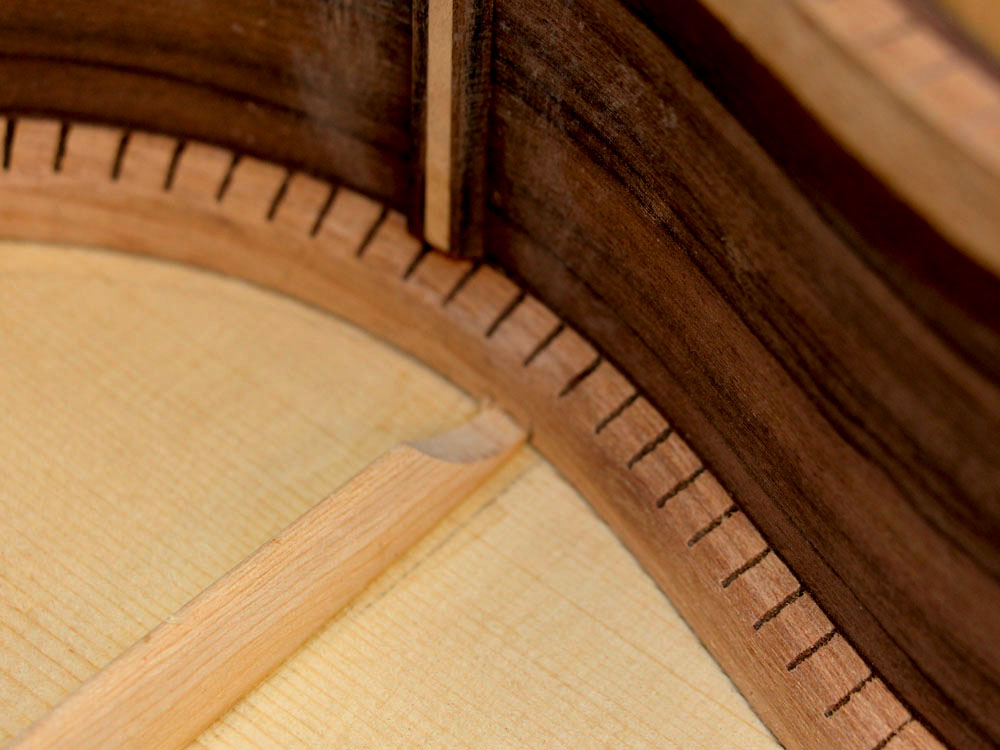
And here is a brace tucked into the kerfing.
 ( 101 ) 30-Nov-2013
The upper bout is reenforced with a layer of spruce.
 ( 102 ) 30-Nov-2013
And it gets glue in place with the go-box.
 ( 103 ) 30-Nov-2013
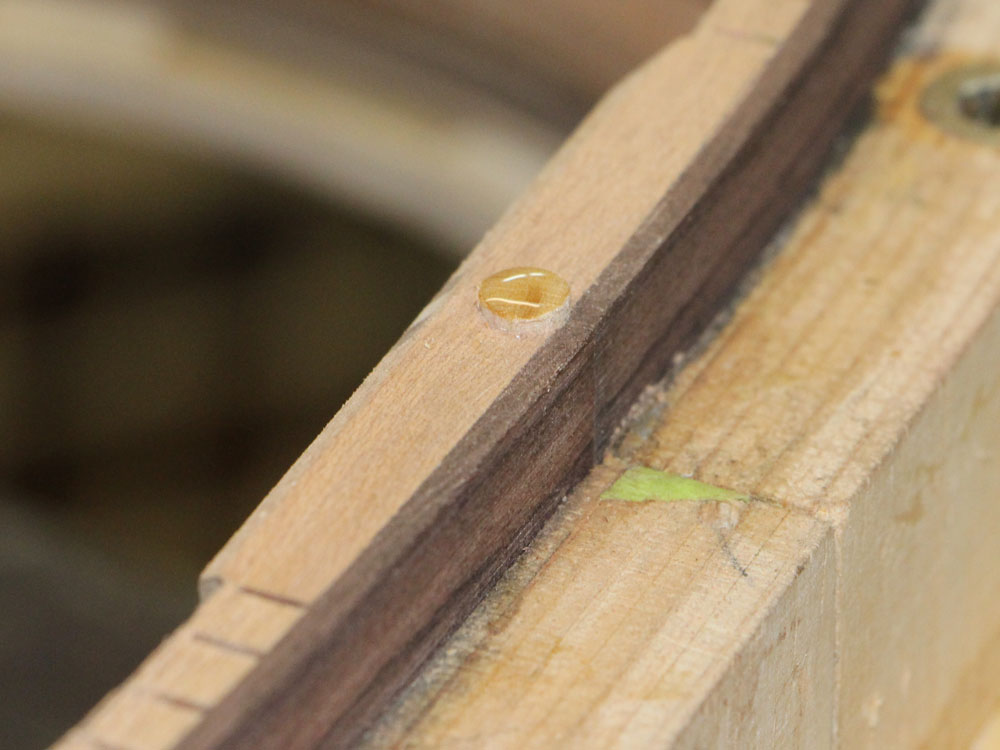
To line up the top on the rim I use a fiducial button. Here is a drop of glue on top of the button.
 ( 104 ) 30-Nov-2013
The rim gets placed on the top making sure everything is lined up right.
 ( 105 ) 30-Nov-2013
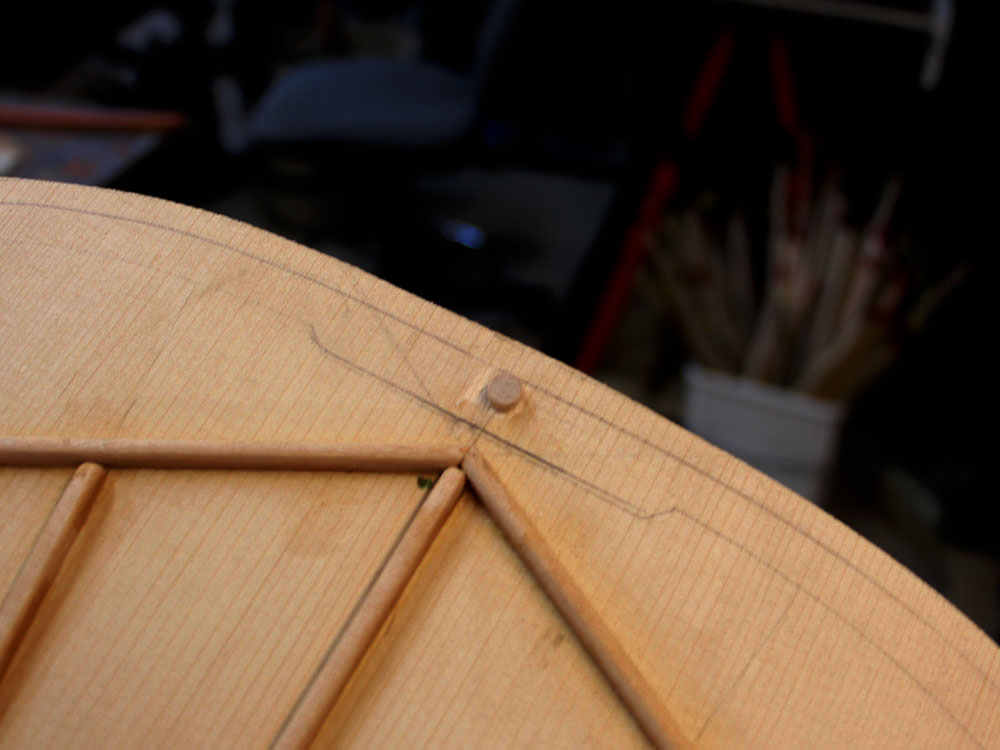
And the button gets glued to the top.
 ( 106 ) 30-Nov-2013
Now, I can glue the top on to the rim without it sliding out of position.
 ( 107 ) 30-Nov-2013
I run a bead of glue around the edge of the rim.
 ( 108 ) 30-Nov-2013
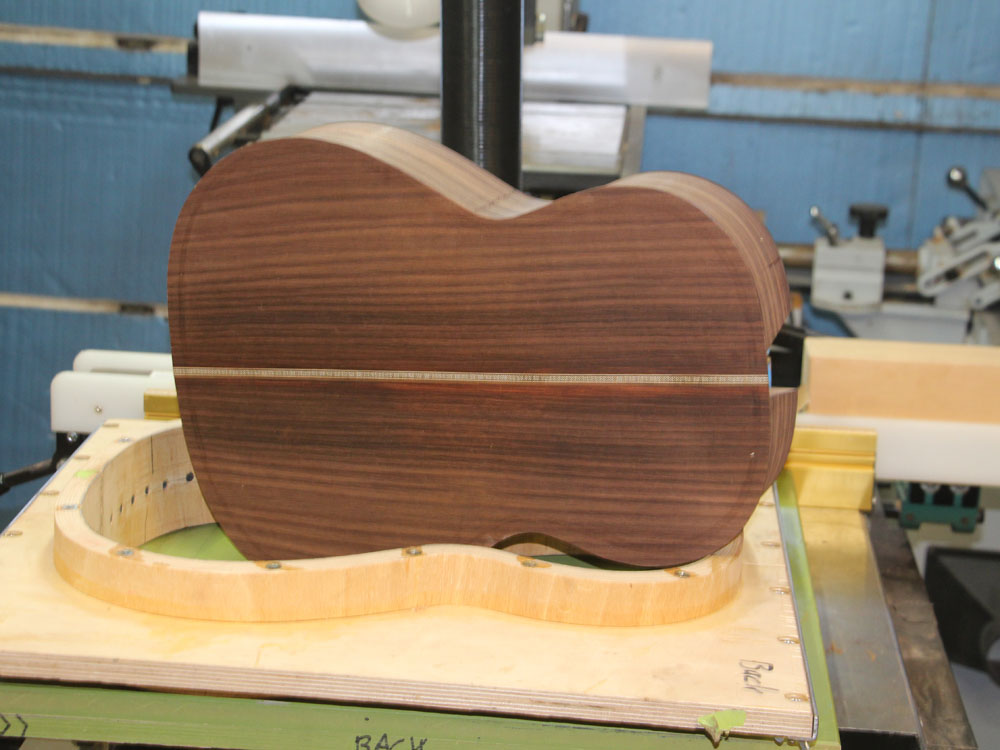
And I use the back flange to press the back into place as the glue sets up.
 ( 109 ) 30-Nov-2013
I clean up the squeeze out with a bit of water and a brush.
 ( 110 ) 30-Nov-2013
 ( 111 ) 30-Nov-2013
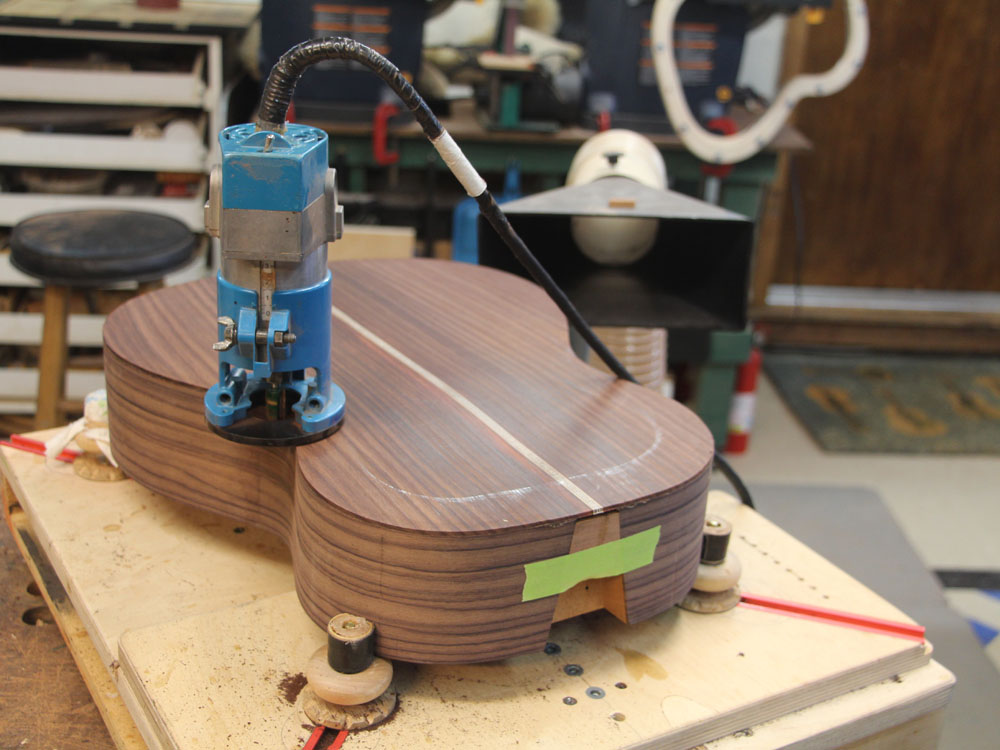
After the glue has set up over night, I use a trim router to remove the over hang.
 ( 112 ) 30-Nov-2013
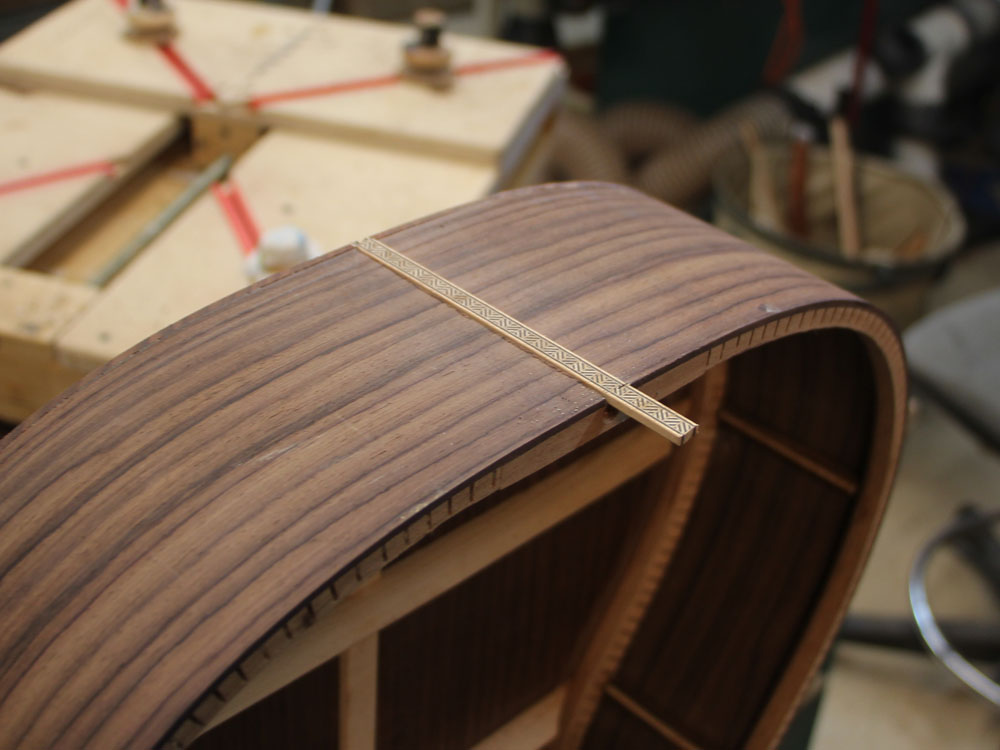
Now with the back in place I can install the tail graft so it will line up perfectly with the back strip.
 ( 113 ) 30-Nov-2013
I trim off the end and sand it flush.
 ( 114 ) 30-Nov-2013
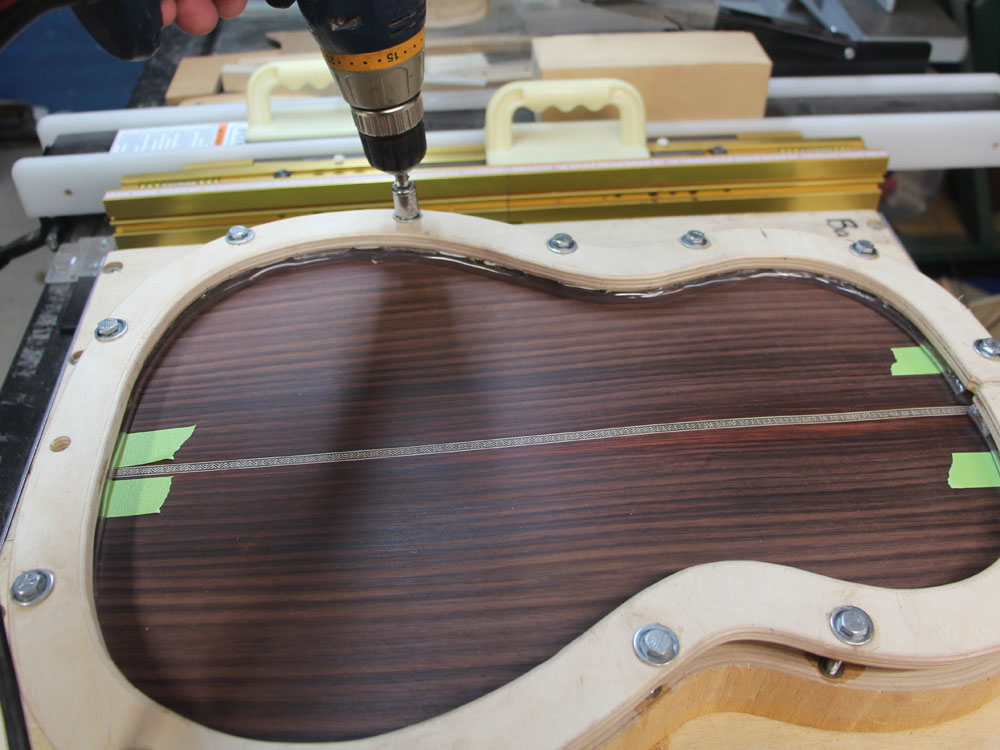
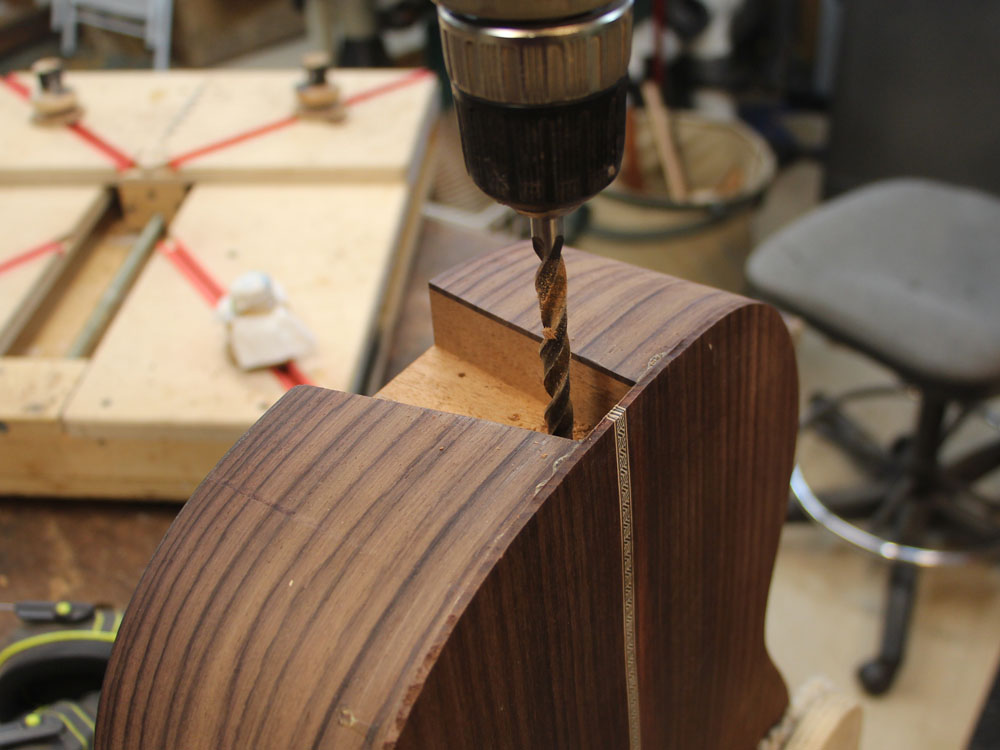
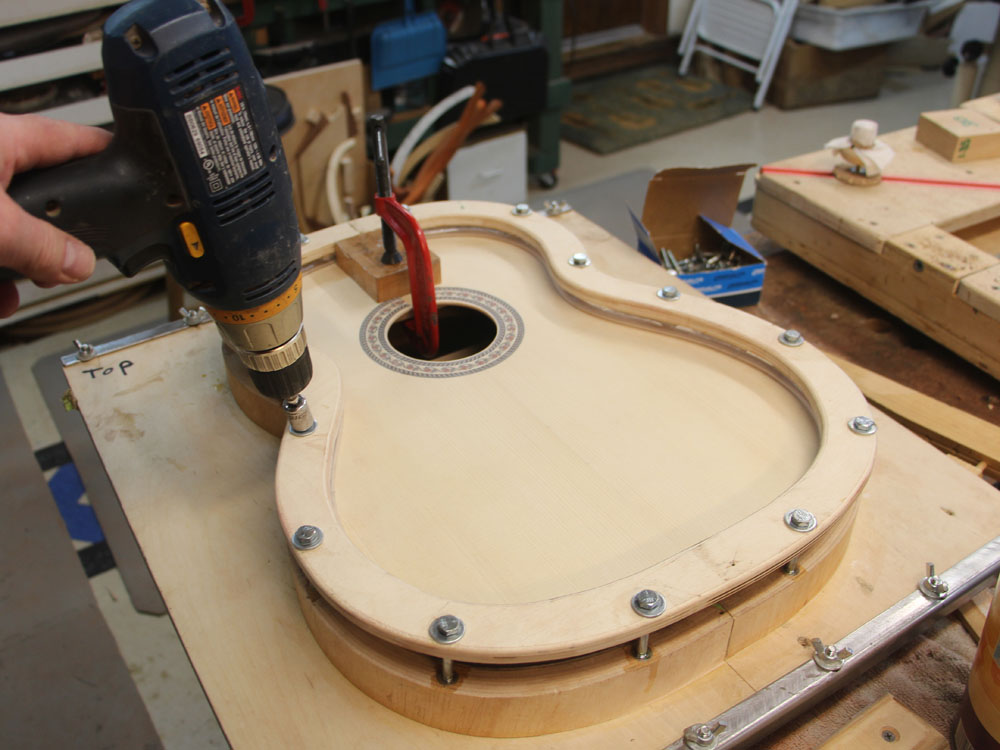
A hand drill is used to drill the hole for the neck hardware.
 ( 115 ) 30-Nov-2013
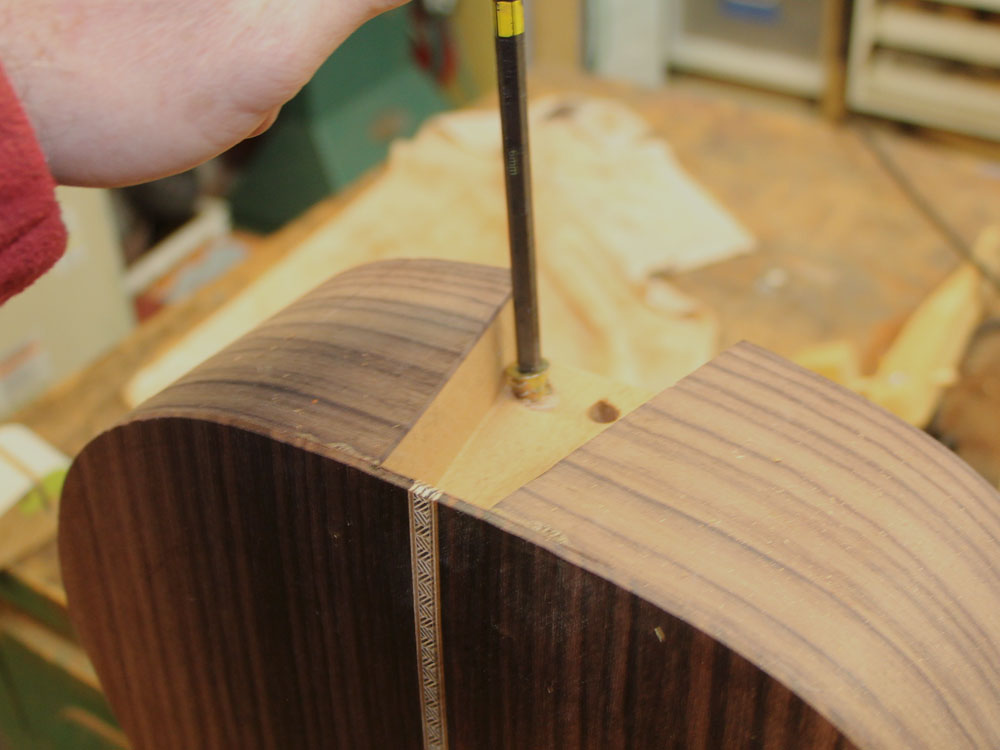
I install the neck adjustment bolt from the rear.
 ( 116 ) 30-Nov-2013
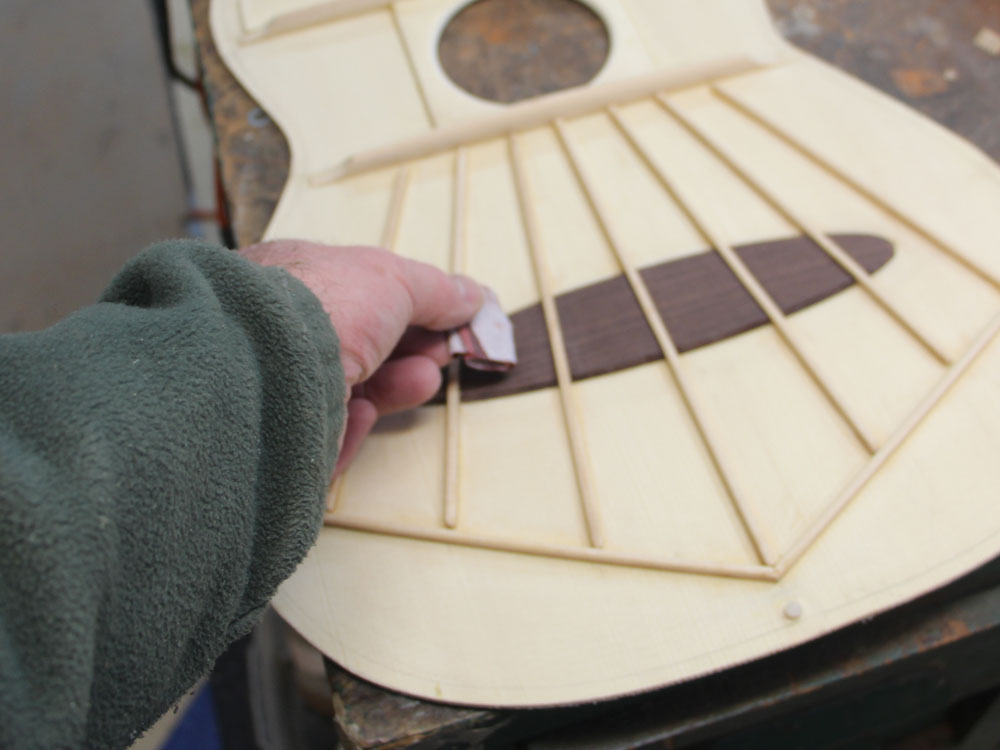
Before I glue the top on I clean it up and make it look pretty. It helps the notes get out of the guitar better.
 ( 117 ) 30-Nov-2013
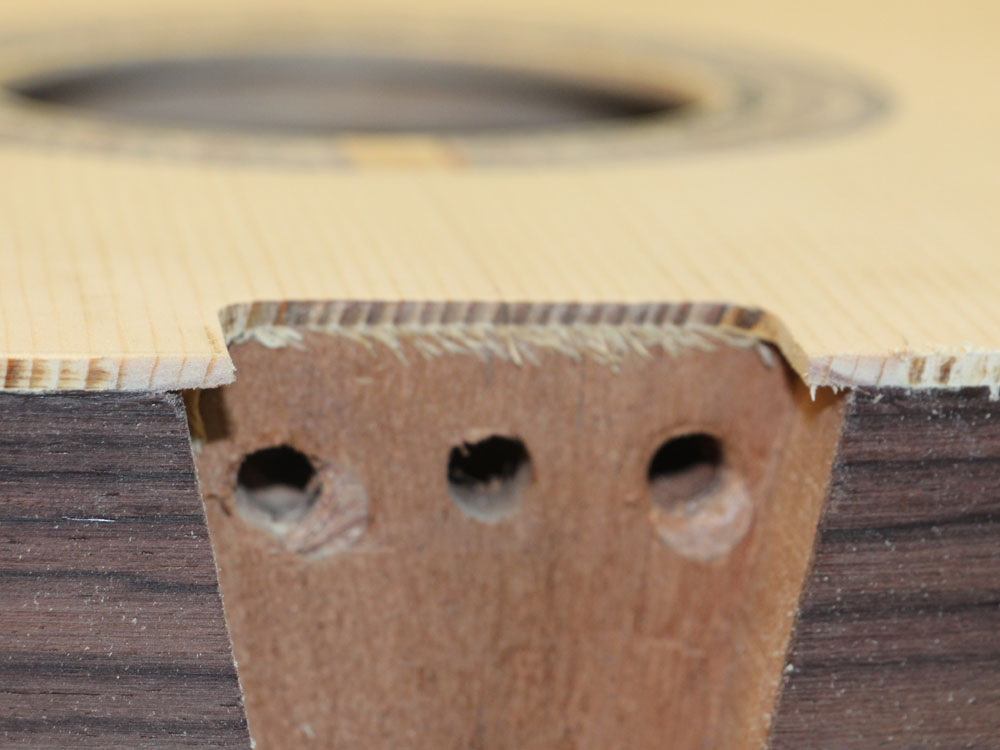
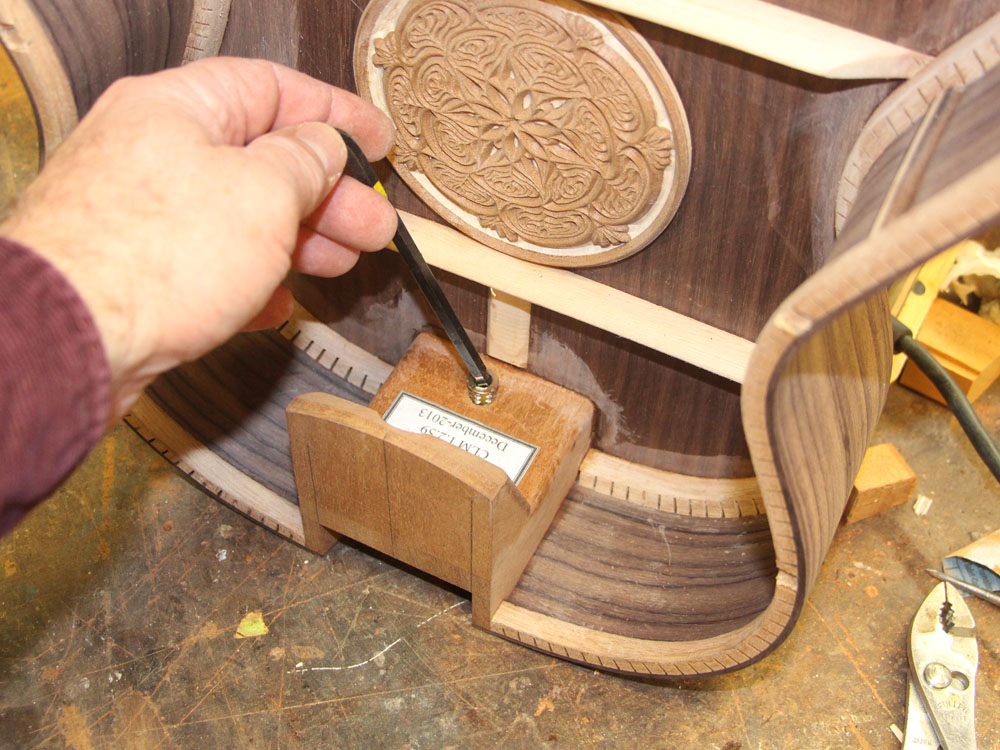
These inserts make up two of the legs of the neck mount. These two inserts will have set screws that allow me to adjust the neck extension and the yaw of the neck.
 ( 118 ) 30-Nov-2013
Glue is applied the edge of rim.
 ( 119 ) 30-Nov-2013
And the top flange presses the top into place.
 ( 120 ) 30-Nov-2013
I use the trim router after the glue has set.
 ( 121 ) 30-Nov-2013
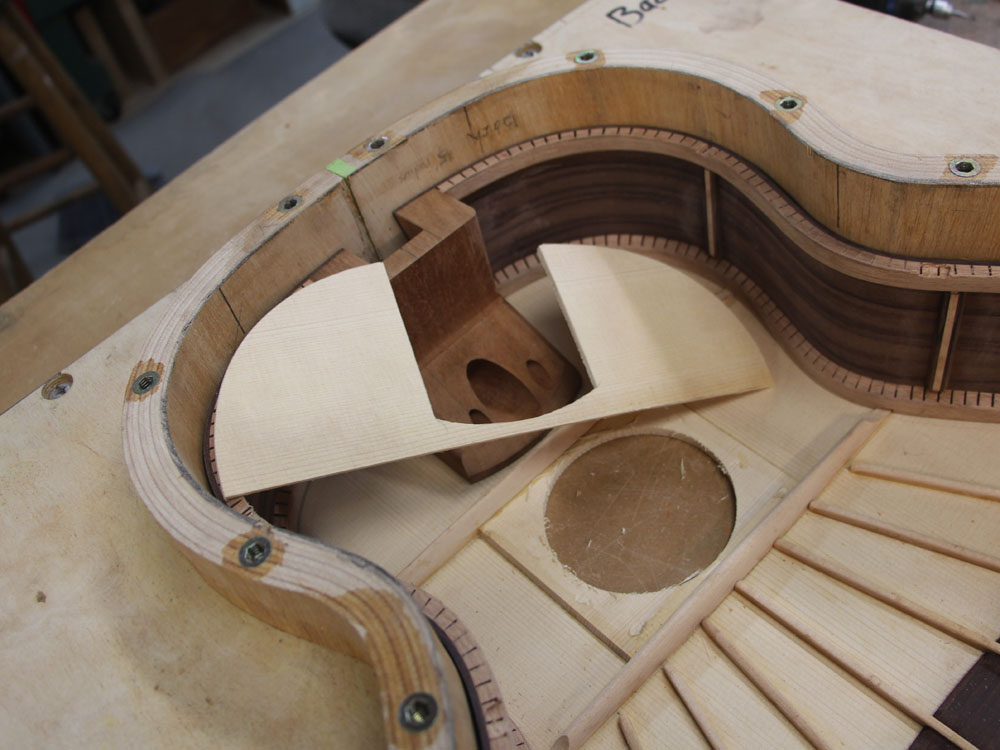
These two channel wings help hide the space between the top of the guitar and the bottom of the fretboard.
 ( 122 ) 30-Nov-2013
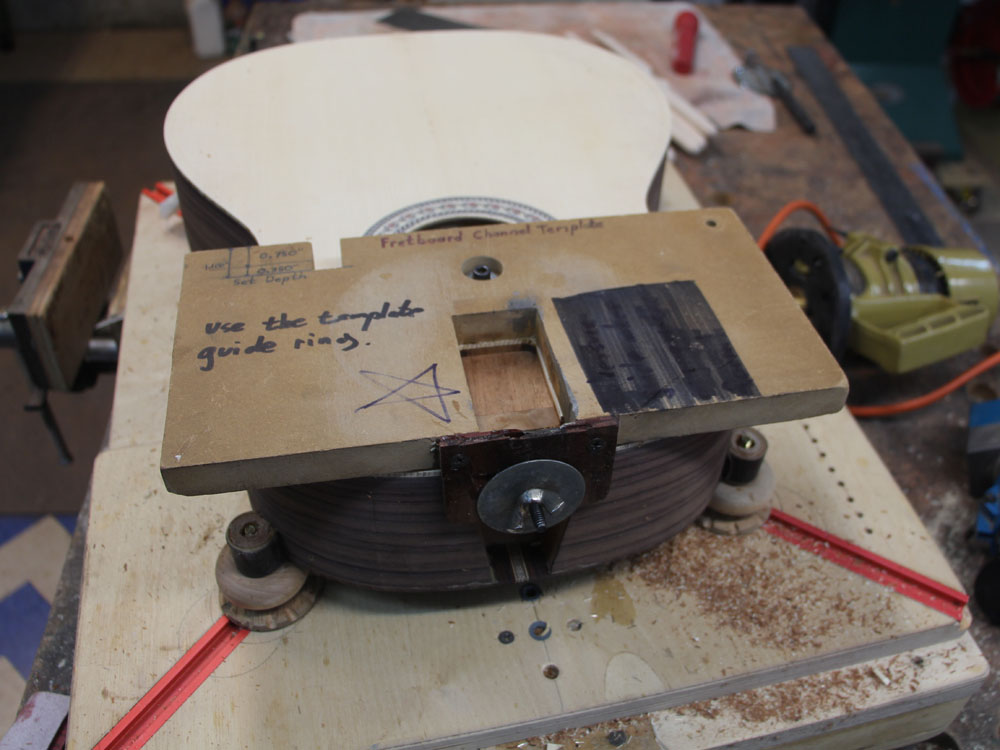
The next step will create a channel for the rib that supports the cantilevered section of the fretboard. The design of the neck attachment method I use allows the musician playing the guitar to adjust the angle of the neck relative to the top. This will effectively raise or lower the string action... you can set it, and reset it until you find the action that is perfect for you.
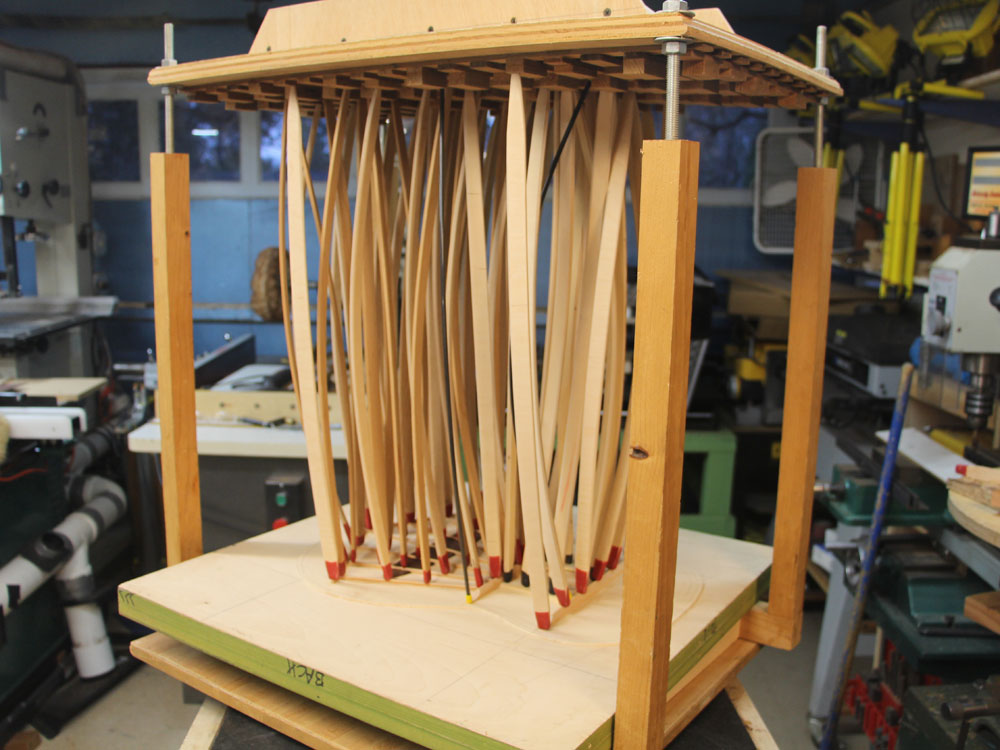
 ( 123 ) 30-Nov-2013
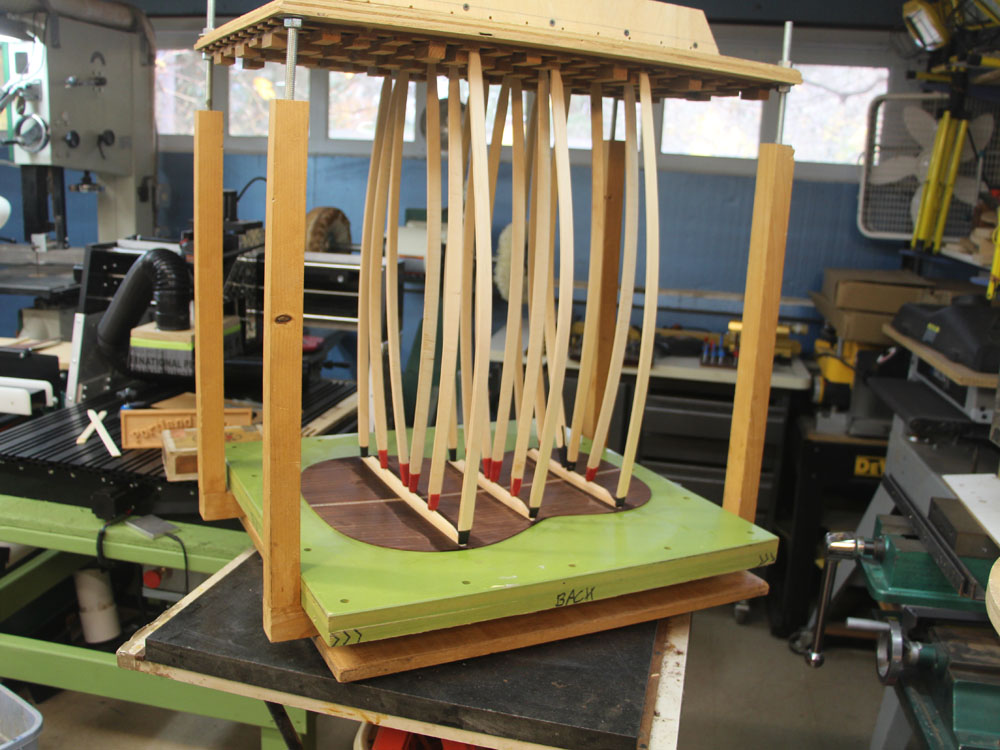
So, to do this the neck is mounted on a tripod and the fretboard floats over the top of the guitar. Necessarily, this means there is a space between the top of the guitar and the bottom of the fretboard, and the cantilevered portion of the fretboard needs to be reenforced. The channel I create with this template makes room for the supporting rib.
 ( 124 ) 30-Nov-2013
 ( 125 ) 30-Nov-2013
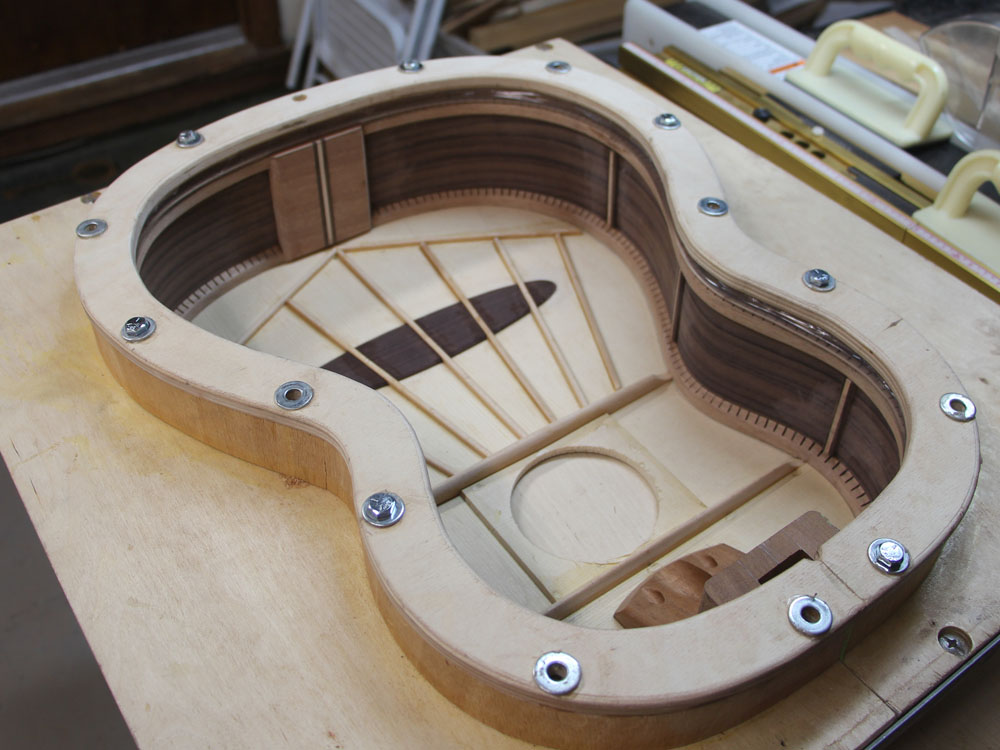
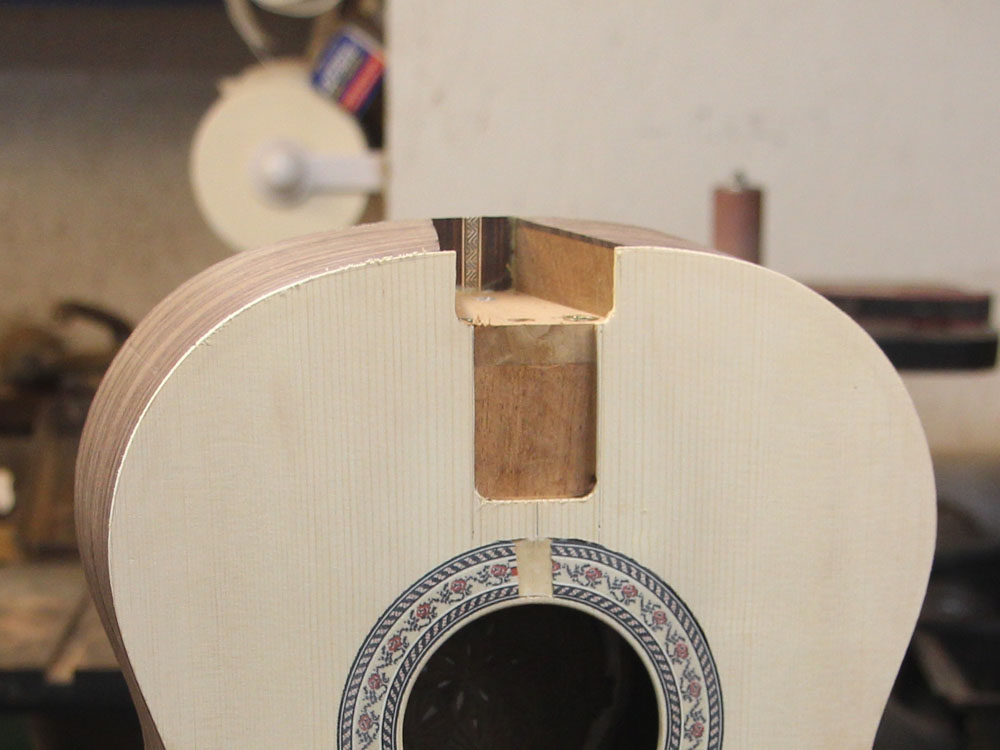
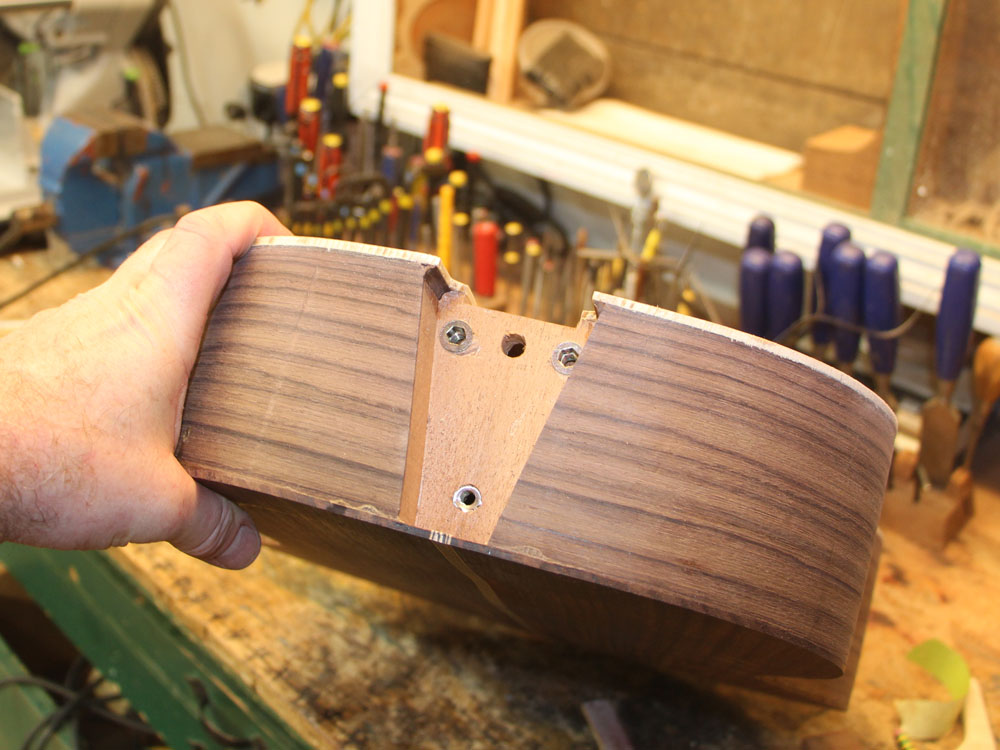
The three posts of the tripod are seen here. The upper center line hole is for a bolt that attaches the neck to the body. I call it the "feel good bolt", because it makes you feel good when your neck doesn't fall off the guitar when you change strings.
 ( 126 ) 30-Nov-2013
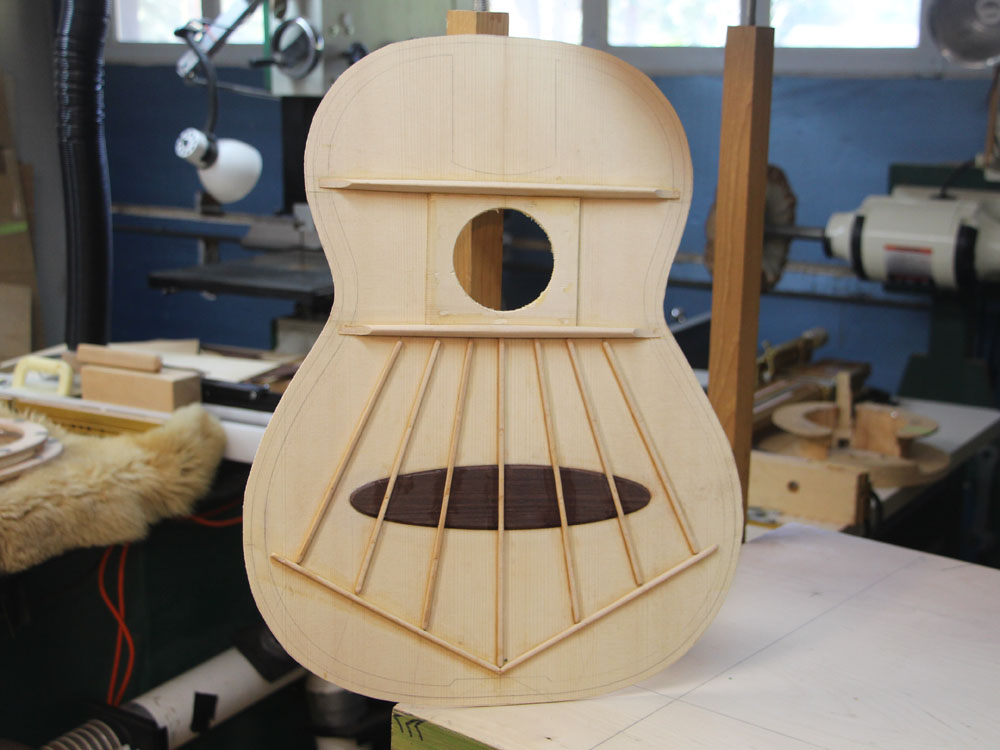
A few quick pictures...
 ( 127 ) 30-Nov-2013
I think the contra-rosette compliments the rose theme of the rosette quite nicely, by any other name ...
I am looking forward to using the CNC router to make some interesting contra-rosettes... should be fun.
 ( 128 ) 30-Nov-2013
 ( 129 ) 30-Nov-2013
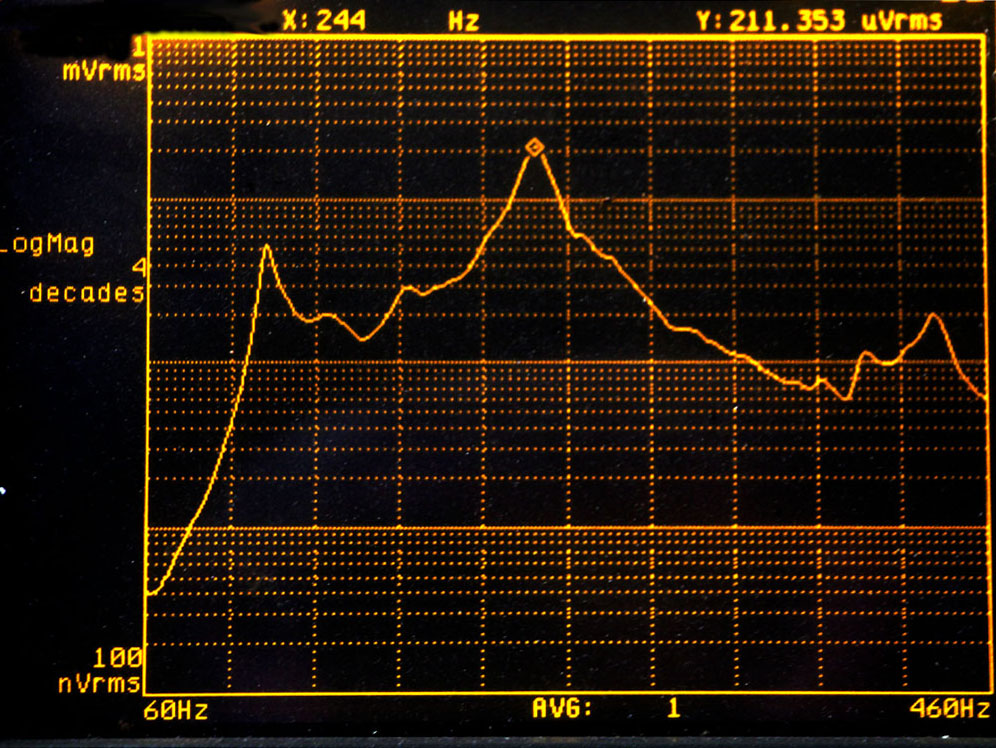
Finally, I made a quick measurement of the Frequency Response Function, up to 460 Hz, of the free floating sound box struck at the center of the bridge plate with a lightly padded mallet. This is the spectrum of the sound that results. The amplitude of the trace indicates how responsive the box will be for any given driving frequency.